Category Archives: Reviews

Hardware & Software Reviews

Digital Brushes and Assets

If you follow any of my social media, you’ll probably know that I love using Procreate and Affinity Designer on my iPad to draw.  Although they’re two of the best mobile drawing apps that currently exist, they have their limits in the number of drawing tools available in each app. Thankfully, there’s a great community of artists that make a wide assortment of brushes for Affinity Designer/Photo, Procreate, and Photoshop.

Frankentoon

Frankentoon is one of my favorite websites for aftermarket brush sets and assets for Procreate and Affinity software. They’re constantly releasing new packs and even provide tutorials how to use them. Their nature brush pack is a huge timesaver for anyone who needs to paint leaves, smoke, water, rocks, etc.

Procreate Community

The Procreate community of artists is a fantastic resource for artist-made brushes and tools. Whenever I’m looking for a very specific type of brush, I search the community and I’ve always been able to find one for free or at a nominal fee. iPadLettering.com is also a great source of very affordable brushes and shapes, especially if you’re looking to create lettering artwork. Script isn’t my strong suit, so I mostly use a variety of drawing and painting brushes instead.

Jazza’s Photoshop Brushes

Before Procreate, Affinity, and the iPad Pro existed, I did most of my digital illustrations in Photoshop. In those days, I used a brush pack created by YouTuber, Josiah Brooks, who is also known as “Jazza”.

Luna Display Review

Last year, I backed the Luna Display on their Kickstarter campaign and I’ve had a couple months to use it. In case you’re unfamiliar with the Luna Display, it’s a dongle that allows you to wirelessly use your iPad as a second monitor for your MacBook. It’s available in USB-C and Mini Display Port models depending on your hardware needs. As of the time of this writing (10/17/2018), only MacBooks and iPads are supported.

IMG_2206

Since I have a 2012 MacBook Pro, I needed the Mini Display Port model. I typically use my Wacom Cintiq 21UX as a secondary display for my MacBook, but I recently took that into my office for a project, so the timing of receiving the Luna display was perfect since I no longer have a graphics tablet for my home office.

IMG_2207

In order to use the Luna Display, you’ll need the Luna Display, Astropad Standard, and/or Astropad Studio apps installed both on your iPad and MacBook. I have both the Luna Display and Astropad Standard apps and will cover the pros and cons of each.

Screen Shot 2018-10-18 at 7.25.41 AM

The Luna Display app is for anyone who doesn’t already own or want to buy Astropad Standard or Studio. It’s the standard app they suggest using with the Luna Display and you’ll need to run it on both your iPad and MacBook Pro at the same time. All you have to do is plug in the Luna Display, start the apps ,and everything auto connects. You’ll then be prompted to choose where you physically want the iPad to act as the second monitor (i.e. to the left, right, top, or bottom of the MacBook). It also asks if you’d like to use it as a retina display, but my MacBook Pro was released just before the retina MacBooks and doesn’t support this feature. Yes, my MacBook is that old.

IMG_2209

One benefit of using the Luna Display app is that you can use a 3rd party keyboard to control your apps. For instance, sometimes I want to go out on the porch to work on a project in Adobe Animate CC, but I don’t want to have to lug my MacBook around with me. This allows me to just grab my iPad, iPad Keyboard, and Apple Pencil, and I can control my MacBook from anywhere around the house. The keyboard is great for shortcut keys and full typing. The downside is that it doesn’t support pressure sensitivity while drawing. This can be problematic if that’s primarily what I’ll be doing.

Screen Shot 2018-10-18 at 7.21.55 AM

If I’m going to be relying heavily on pressure-sensitive drawing, I’ll boot up Astropad Standard instead. Astropad Standard is more geared for digital artists and supports full pressure sensitivity when used with an Apple Pencil. You’ll see the options for brush pressure-sensitivity and tilt appear in Adobe Animate CC when Astropad is running.

IMG_2208

The downside to using Astropad Standard with the Luna Display is that the 3rd-party iPad keyboard no longer works. Instead, you’ll need to use one paired to the MacBook if you want a physical keyboard. That being said, Astropad Standard does supply a soft button that brings up a list of customizable shortcut keys, which can eliminate the need for a physical keyboard.

IMG_0030

There is just a slight delay when using the Luna wirelessly, which you may not even notice if you’re not using your iPad to draw on and only want it as a second monitor. This seems to go away when it’s connected via lightning cable, which is my preferred method anyway so that way my iPad gets charged as I’m using it. It is something to consider, though if you’ll always being using your Luna wirelessly for drawing.

Overall, the Luna Display is a great addition to anyone with an iPad and MacBook Pro who wants a secondary monitor with which to travel. Also, any digital artists looking to use Photoshop, Animate, Toon Boom, etc. on a drawing tablet that can be taken with you will benefit from this. I like having it as a Cintiq substitute and I’m glad I was one of the first Kickstarter backers.

Pixel Art

I’ve been experimenting with different software that allows you to draw pixel artwork easily. My first test was in Affinity Designer since I’ve been using it on a regular basis anyway. This was as easy as creating a grid and then using the rectangle tool to fill in the squares. It’s simple enough to complete as long as you have a good idea of the grid size you’ll want to use.

Screen Shot 2018-09-23 at 11.01.07 AM

I then tried a website called Piskel, which is free to use. One really nice feature of Piskel is that you can create animated gifs and export them.

Screen Shot 2018-09-23 at 11.06.18 AM.png
Creating an animated gif in Piskel

You can change the both the grid size and the exported frame size in Piskel depending in your needs and since free and available as a website, it’s definitely a very approachable way to create pixel art.

Self

Finally, I tried a free iOS app called Dottable. This app, much like Piskel, is pretty easy to learn and has a small learning curve. I’m not sure if it can easily produce animated gifs like Piskel, though. One big positive it has is that it allows you to convert any photo from your device into pixel art. This can be a big time-saver whether if you want to use the converted image as-is or even just as a starting point.

IMG_0001

What pixel art software do you like to use?

Quickly Creating a 2-D + 3-D Cartoon

Part of my day job is creating animated cartoons for online learning courses. For my latest project, it was decided to have it set in an apartment with two-dimensional cartoon characters superimposed. Given the time frame, I tried to find the easiest and fastest way to model the apartment in 3-D using inexpensive software with the smallest learning curve.  Planner 5D met all of my requirements, so I decided to give it a shot.

Planner5D1
Planner 5D on Windows 10

One thing I really liked about Planner 5D is that it’s available for Mac, PC, and mobile devices. This was handy because I could work in it anywhere and could easily show off different layouts to the team even if I wasn’t near my desktop computer.

Planner5D3
Planner 5D on an iPhone 8 Plus

It also has a lot of built-in models that you can quickly drop in and customize as needed, which was a huge time saver. I was able to learn the software, create an apartment for the project, revise as needed from team feedback, and render out all of the stills in about 2 business days.

Planner5D2
Some of the options of pre-built assets Planner 5D has available.

For the characters, I quickly sketched out some ideas in Procreate on my iPad Pro based on the descriptions given to me by the instructional designer during our meeting. In this case, the main characters were a college student and his anthropomorphic ostrich roommate.

I imported the sketches into Adobe Animate, traced them, and broke them into individual graphics so they could be easily animated.

Animate1Animate2

I then imported the background images that were created and rendered in Planner 5D and animated the characters on different layers. The Keyframe Caddy extension for Adobe Animate is a huge time-saver and cut down the amount of time it took to lip-sync the characters to the dialogue.

Animate3

If you’re looking to make an animation in a similar style, I hope you also find these tools useful. I know personally, it was very handy to have software like this to cut down on production time.

Affinity Designer

A few years ago, I was commissioned to create an online course about Affinity Designer. This was when Affinity Designer was still fairly new and not a ton of illustrators used it. Fast-forward three and a half years, and it’s become one of the best graphics applications for both desktop and iPads.

MixTape
Affinity Designer for Windows interface

Truth be told, just based on the work I had after creating the course, I stopped using Affinity Designer for awhile. When I heard they were debuting a version for the iPad, I quickly regained interest and bought it on its release day. It immediately became one of my favorite iOS apps that I own and I’ve used it almost every day since.

Di0tzfrWwAMEZ9X
Affinity Designer for iPad

The iPad version is full-featured and not just a watered down version. Also, sticking to Serif’s business plan, there are no subscription payments involved, everything is buy-once, keep forever. It’s definitely worth your time to watch their tutorial videos about using gestures to control the app, as they’ve done a great job translating mouse clicks into finger gestures.

Since the iPad version release, I’ve been drawing in Affinity Designer so much that I had to update my website to display all of the new illustrations I’ve completed. Everything from t-shirt designs, concept art, and final products that I’ve used for my day job have been done all on my iPad.

GP Animations
http://www.GPAnimations.com

I love that if I’m on the go, I can just grab my iPad and take the project I had open on my PC or MacBook and open it in the iOS version of Designer. It’s really as simple as just opening the file from Dropbox or Google Drive and finishing your work on the go.

I also have the PC, MacOS, and iOS versions of Affinity Photo, but I haven’t had a chance to use them extensively yet. I did play around with some of the features for some quick photo editing and it seemed pretty intuitive just like Designer.

AffinityPhoto
Affinity Photo interface

Overall, if you haven’t tried Affinity Designer and Affinity Photo and you’re tired of paying for Adobe Creative Cloud, you really should check them out. If you’re an Adobe InDesign user, they’re also making Affinity Publisher, which is currently in Beta as of the time of this writing. Now if I could only get them to make an Adobe Animate CC replacement, I could completely drop all Adobe products…

PlaceIt.net

Last year, I wrote a tutorial about creating screenshots for app stores for RayWenderlich.com. In the tutorial, I mentioned using a website called PlaceIt.net because they have a great variety of options and pricing to fit every budget (yes, even Free). Today, I want to take you through step-by-step on how to fully utilize their site to create amazing promotional material for your apps and games.

placeit

PlaceIt.net lets you upload app screenshots, images, URLs, videos, or screen captures (using RecordIt) into beautiful photographs and videos to help advertise and promote your product or brand.

Still Images

You can sort by devices, interactive video, still shots, video, multistage, etc. and then it will list the require resolution needed to fill the stage. You can choose to drag and drop an image, upload it, or even just provide the URL to the image you’d like to insert. If your image doesn’t fit perfectly, you can adjust the cropping to completely fill the area.

https://placeit.net/#!/stages/girl-using-iphone-6-and-imac-at-office

Once you’re happy with the result, you can choose to Add Effects or Download. When you click download, you’re given the options for the Small Free Version, the High-Res Commercial, or Super High-Res Extended Commercial versions.

downloadplaceit

Depending on your desired use, you’ll have to determine which version you’d like. If you’re unsure of the differences, you can click the “Not sure which license is the best for you?” link and it will explain each license in detail.

placeitlicense

Videos

There is where PlaceIt.net really shines. Sorting by Video, I chose a panning video that would show my children’s book app, Maddie Bear’s Birthday, running on an iPad. I didn’t have a pre-recorded video handy, so I clicked on the Record Your Screen option. This allowed me to download RecordIt, and record the iOS Simulator running on my computer.

https://placeit.net/#!/stages/ipad-on-wooden-kitchen-table?background=192_vi&f_types=video

Once complete, the video uploaded and I was able to view and download it. Here you see the free version that I downloaded, which has a watermark on it. Paid downloads do not contain watermarks.

Pricing

Pricing on PlaceIt.net varies depending on the type of media, license, and if you choose a subscription plan or single purchase. Still images range from Free to $59 USD for single purchases and videos range from Free to $189 USD for single purchases. If you you know you’re going to need to download a few pieces of media, it’s worth signing up for a subscription plan. Plans range from $12 a month to $299 a month depending on how many you’re going to need on a monthly basis.

Since they have pricing ranging from free for casual users through $299 a month for corporate users, it really feels like PlaceIt.net is trying to accommodate every user and every budget.

Overview

The sheer number of images, interactive videos, and videos along with flexible pricing, makes PlaceIt.net unparalleled to any other service I’ve tried. In the past, Promotee software was my go-to when I needed a quick promo image of my apps, but it is very limited in the devices you can show, and there’s no option for video. I can’t recommend PlaceIt.net enough for promos and advertising your products.

Amazon Kindle Fire Kid’s Edition Review

One of my clients, who I’m developing an app version of their children’s book for, sent me a Kindle Fire Kid’s Edition for device testing. I’m going to give a brief overview and review of the device from a consumer, developer, and parent point of view.

IMG_1382

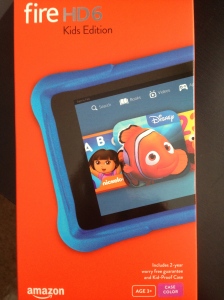
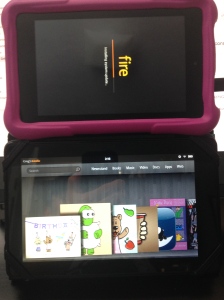
Opening the Box: Inside the box is the Kindle Fire Kid’s Edition, MicroUSB charging cable, wall plug, and rubber case. I was pleasantly surprised to see a MicroUSB cable in there, as my first-generation Kindle Fire didn’t come with one and I’ve had to use one from a Palm Pre for development. I’m pretty sure this is just Amazon’s Fire HD 6″ tablet with a rubber case, an extra 1 year warranty tacked on, and FreeTime pre-installed at an extra $50-$90, depending on their current sales.

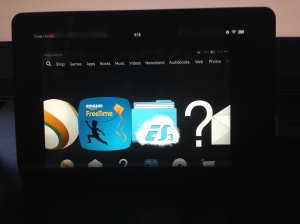
Interface: The interface has improved since the first-generation Kindle Fire, which is nice. The graphics are a lot more crisp and the speed is much faster. Just the speed upgrade alone might be worth it if your only other Kindle Fire device is a first-generation like mine.

IMG_1384

Size Comparison: In relation to the first-generation Kindle, the kid’s version is lighter, but also has a smaller screen size. Once you insert it into the rubber case that helps protect it from kids dropping it, it actually ends up a little wider than the first Kindle.

IMG_1383

Software: The main difference between the Kid’s Edition and regular Kindle Fires is FreeTime. This provides your child unlimited access to pre-approved books, games, and TV shows on the device. However, it does feel like the added FreeTime, parental controls, and profiles bog it down a bit. The device often freezes or has issues, which requires a reboot.

Developer Review: In comparison to the first generation Kindle Fire, you need special software to transfer .apk files to this device. Whereas my old Kindle Fire would instantly appear on my MacBook for me to drag and drop files, the Kid’s Edition requires Android software. However, with the Kid’s Edition, you can just close the software and unhook the device from your computer, you no longer have to eject the media. I’m not sure how you get your apps on Amazon’s Pre-Approved FreeTime listings, they may have to contact you if they deem it worthy. I was unable to find any of my children’s books and apps while logged into my daughter’s FreeTime account. Like every device after the first-generation, this one doesn’t have the 20 pixel tall menu bar hardcoded onto the screen, so that’s something to consider when developing apps for it.

Consumer Review: At the time, the Kid’s Edition was $150 USD, but now I see it’s gone up to about $190, which seems pretty steep. As I said, it’s really just a $100 Fire HD with a rubber case, FreeTime, and an extra 1 year added to the warranty. You can get FreeTime on your Fire TV, a rubber case for $3 on eBay, and just try not to break a $100 Fire HD after a year, and essentially save yourself quite a bit of money. Also, the bloatware of having FreeTime slows down the device and causes freezing. It’s much nicer than the first-generation Kindle Fire, but at this day and age, those random $40 Android tablets found in bargain bins are faster than the first Kindle Fires.

Parent Review: My daughter loves the Kid’s Edition Kindle. At only 2 years old, she immediately knew how to navigate the interface, download books and games, watch TV shows, and switch between apps without me showing how to do it. The rubber case makes it easy for her to hold and protects it against drops. The limited access makes it easy for me to hand to her and not have to worry about her downloading or buying something she shouldn’t be. However, while using the device in the car, I tried to switch from my account to my daughter’s and it wouldn’t let me without a wi-fi connection to verify my password. This is a terrible feature that Amazon needs to address.

Overall: At $150 or less, the Kid’s Edition is a great deal for parents. At $190, you’re probably better off with something else or just buying a cheaper tablet and getting a rubber case for it. The software can bog down and the fact that I couldn’t switch accounts without wi-fi is pretty bad. That being said, it’s still a nice device for younger kids and knowing it can be replaced for 2 years if it breaks is nice.

Android TV

In July,  I signed up for the Android TV Developer Program. Without notification, they shipped me the developer’s kit and I received it yesterday in a plain brown box with a plain white box inside of it. There wasn’t any paperwork saying what it was or why I received it, but thankfully I remembered filling out the form months ago.

IMG_1061

It’s about the size of the Amazon Fire TV and the game controller is almost identical, as well. One side of the device is smooth and shiny, the other side has triangular points and an LED light. It also comes with a USB developer cable you can use to hook it to your computer, or you can always sideload .apks via wi-fi and Terminal/Command prompts.

Since I had recently ported one of my games to the Fire TV, I was able to modify the files to utilize the Android TV controller by using the codes on this page.

So far, my impressions are that it’s just like the Fire TV except with less features, which is to be expected since it isn’t available to the general public yet. If you’re not a fan of the Apple TV or being stuck in Amazon’s ecosphere, it will definitely be worth checking out, though.

Tile Review

About a year ago, I pre-ordered a product called “Tile.” Tile is a little white square that you can attach to objects that you don’t want to lose. If you do happen to lose the object, say for example your keys, you can open the corresponding iOS app and it will make the Tile ring.

Tile: Do Not Adhere to Pets

Set up is pretty straightforward. You install the app on your iOS device, press the “e” on the Tile and the app will walk you through step-by-step. When you’re looking for whatever Tile is attached to, you can look at it’s location on a map in the Tile app and have it make the Tile start ringing as you track it down.

To test it, my wife hid the Tile somewhere in the house and using the app, I had to find it. It took me about a minute to locate it as it was ringing. It was in my daughter’s stuffed animal basket, by the way. I haven’t done any long-range tests with it yet though, to see how well it tracks it on the map.

Personally, I keep mine in my wallet in case I misplace it throughout the house. I haven’t adhered it to anything yet because I like the freedom of being able to attach it to multiple objects. Plus, working from home, I don’t have too many chances to lose my stuff. It’s still a nice piece of mind to have, though. Order your Tile here.

Amazon Fire TV: Developer Review

Last week I finally caved and purchased an Amazon Fire TV. I was very skeptical for awhile about purchasing one, especially since initial consumer reviews considered it an “in-beta” product and that the USB port on it doesn’t even support external hard drives or thumbdrives yet. However, a colleague of mine raved about it since it has the capability to accept XBMC and other 3rd part applications, so he actually bought 5 of them. Also, since I created Maddie Bear’s Snack Time for the Fire TV, it seemed like I should be able to test it for myself on an actual device.


Unboxing/Set Up/App Development

Unboxing it reminded me of unboxing the Apple TV. It was just the unit, remote, and a power cord. Setup was also the same, just plug it in and hook it to your TV via HDMI cable and the unit powers up. One thing that I thought was strange is that there’s no way to hook the Fire TV to your computer for app development, it has to be done through your Terminal/Command window. Once you have your Fire TV set up, you’ll have to go into the Settings > About and get its IP address. Then on your computer, connect to it via Terminal/Command window to push apps via adb commands (./adb connect <ip address> ; ./adb install AppName.apk ; etc.). This is pretty easy and I suppose it does save you the time from having to attach/detach the unit from your computer over and over.


Memory

Memory is kind of an issue depending on how many apps/games you plan on installing. After the operating system and XBMC, I had a little over 5 gigs of space left. This doesn’t sound terrible until you consider the fact that a lot of the higher-end games take 2-4 gigs of hard drive space. For example, Grand Theft Auto San Andreas takes up almost a gig. Then when you go to play, it says it needs to install another 2 gigs of data. If I were able to hook a thumb drive to the Fire TV and install games on that, it wouldn’t be a big deal, but since it wanted over half my available space, I opted not to install GTA.


Game Controller

Amazon Fire TV Remote and Game Controller

Games and apps are categorized as Remote support or Game Controller support. Initially my game Maddie Bear’s Snack Time only supported the remote because I didn’t own a device to map out the game controls. I purchased a game controller and was able to add controller support by the following day. From a consumer standpoint, I do prefer games with controller capability, it makes it feel like you’re playing a real video game and not just an Android app that was ported over last second. Also, as a consumer, I really want there to be more great games available. The more I play on the Fire TV, the more I find myself enjoying the experience as a gaming machine.


Amazon Coins

If you do develop a game for the Fire TV and integrate Game Circle, Amazon is running a promotion where they’ll give you Amazon coins to give out to your customers. For example, (at the time of this writing) if you purchase GTA San Andreas, you’ll get $20 worth of Amazon coins as a bonus. Unfortunately, Corona SDK does not support Game Circle as of this moment, so Corona-made apps are not available for the Amazon Coin promotion. If you’re thinking about making an app with game controller support, I would purchase a game controller as soon as possible. Amazon is running a limited-time promotion where you receive $10 of Amazon coins and a $7 game, “Sev Zero”, with the purchase of a game controller. So essentially, you can buy a $40 game controller, get $10 of free coins, get $7 Sev for free, buy GTA for $7 with the coins, get another $20 of free coins, and end up with $14 of games, $33 of Amazon Coins, and a game controller for $40.

Since Amazon is giving away from coins like candy, it’s helping indie developer app sales. Where normally people might be hesitant to purchase a game that only has 1 or 2 reviews, now they’re free to buy it since they’re just using coins they got for free. The more developers are able to give away free coins from feature Game Circle apps, the more it helps the community as well. If you’re looking for a great platform to check out, I’d recommend getting a Fire TV.

Looking to make your own Fire TV app using Corona SDK? Check out Ed Maurina’s Fire TV plugin here.